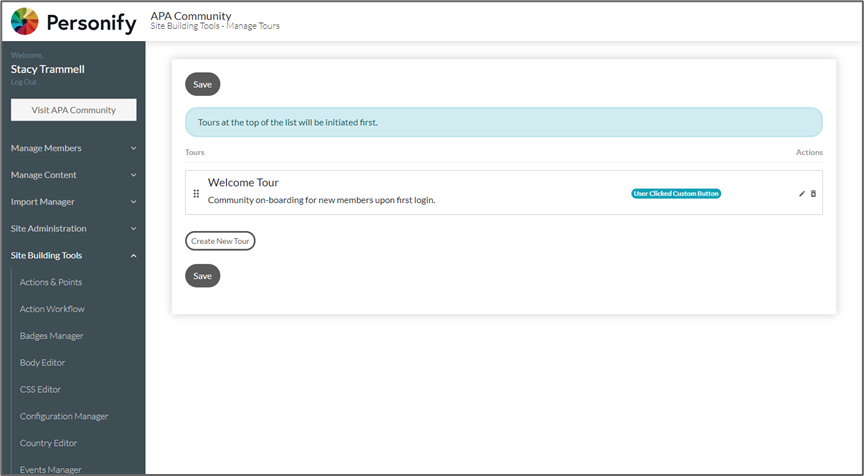
From the Site Building Tools section of the Admin Panel, click Tours Manager. The Tours Manager screen allows administrators to create and manage guided tours through the different pages of the Community.
Add and Edit Tours
Click Create New Tour to add a new tour.
To edit an existing tour, click on the Tour or the edit pencil.
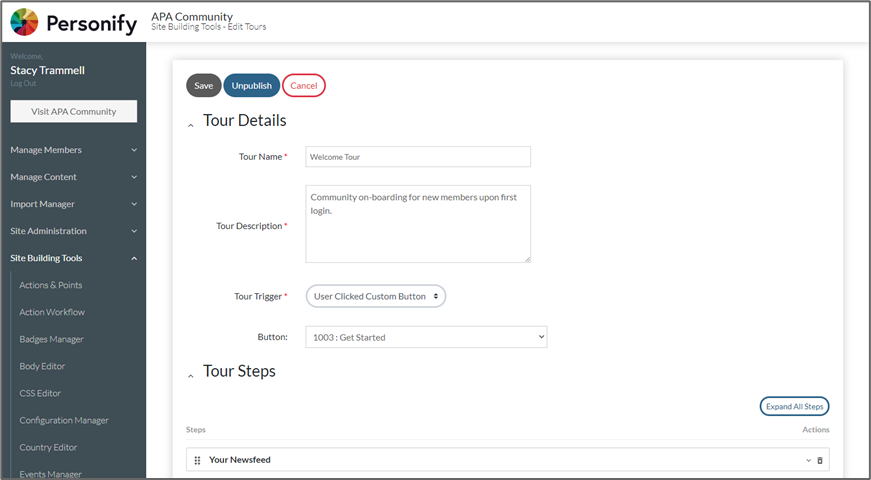
Enter a Tour Name and Tour Description. Next, select your Tour Trigger. These Tours can be activated by several different triggers, such as a new user joining the site or being added to a Segment.
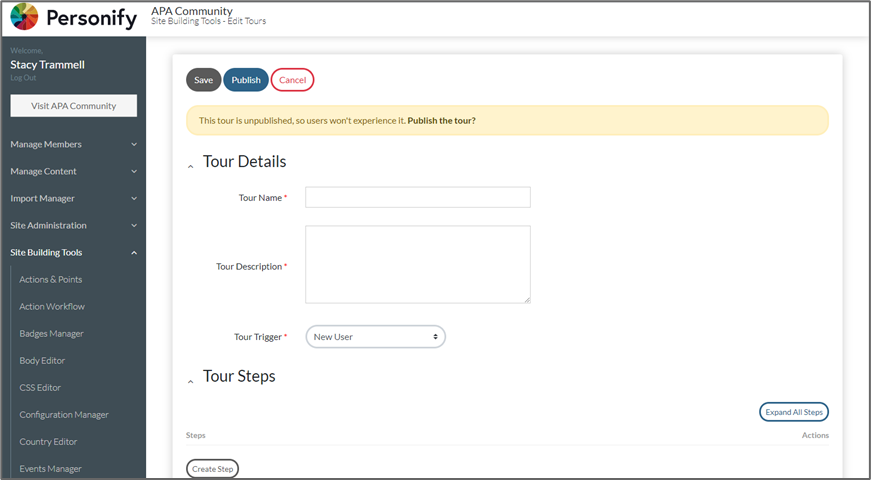
Click Create Step to add a step.
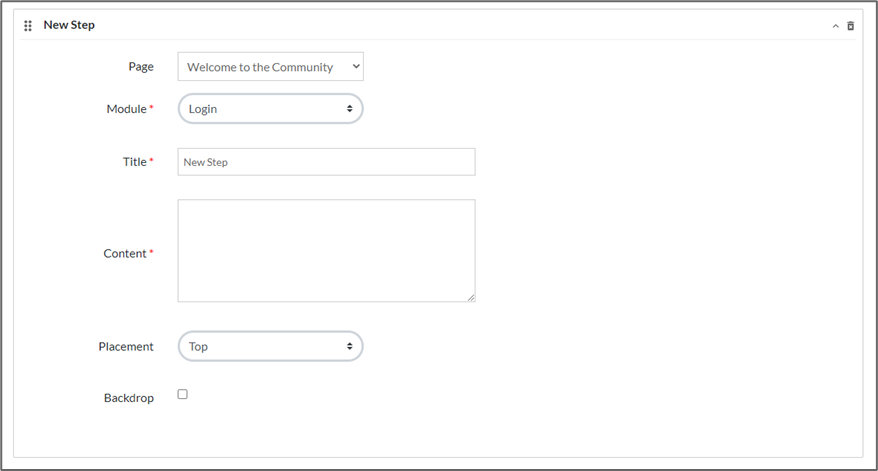
Select which Page the Tour Step will redirect the user to when activated. There may be additional information required depending on which page is selected, such as a specific Post or Topic ID.
Select a Module from the page you would like to draw attention to.
Enter the Title and Content for the Tour Step.
Select the Placement position for the Tour Step. This determines where the box will appear in relation to the selected module. We recommend only using Top and Bottom for the best results.
Enable or disable a Backdrop. This will cause the page around the specified module to be covered in a semi-transparent veil.
Click Save.
Publishing and Unpublishing Tours
When your tour is finished, click Publish. Clicking Publish will cause the tour to go live and allow users to activate it.
To unpublish a tour, click Unpublish. Clicking Unpublish will cause the tour to end for all in progress users and prevent further activations.
Premium has two welcome tours available, the “Premium Welcome Tour” includes an introduction to events and discussion forums. Publish the premium tour and unpublish or delete the “Welcome Tour”.
Tour Metrics
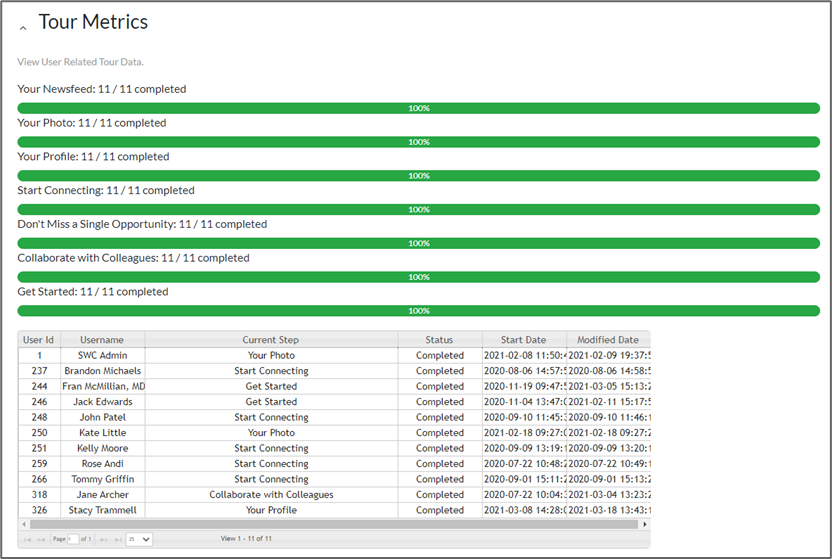
Tours offer a metrics area to allow admins a way to see each user’s individual progress through the Tour as well as completion rate for each step.
To view Tour Metrics, edit the tour and expand the Tour Metrics section at the bottom.
