What is it?
Menu items are the tabs located on your site's home page. The most common item linked to menu items are article pages. When you click a menu item, it will take you to the article page to which it's linked.
How to access
To access a menu item, go to Website->Menu Manager->Click on the menu set you want to edit (for most organizations, the main menu set is titled 'Main Menu' or 'Primary Menu'). then either click on an existing menu item's name, or click the New button at the top of the menu item page. These are both pictured below.

If you're editing an existing menu item, click this link to skip to the section that details how to link an existing menu item to an article.
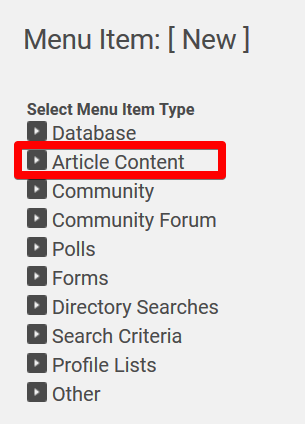
If you're creating a new menu item, once you click the New button, you'll see the below image.

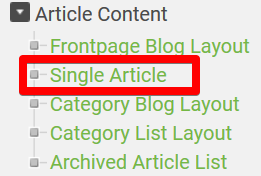
To attach the menu item to an article, you want to click the Article Content option highlighted in the red box in the image above. When you do, you'll see a number of options. Once you do, choose the option Single Article, as is pictured below.

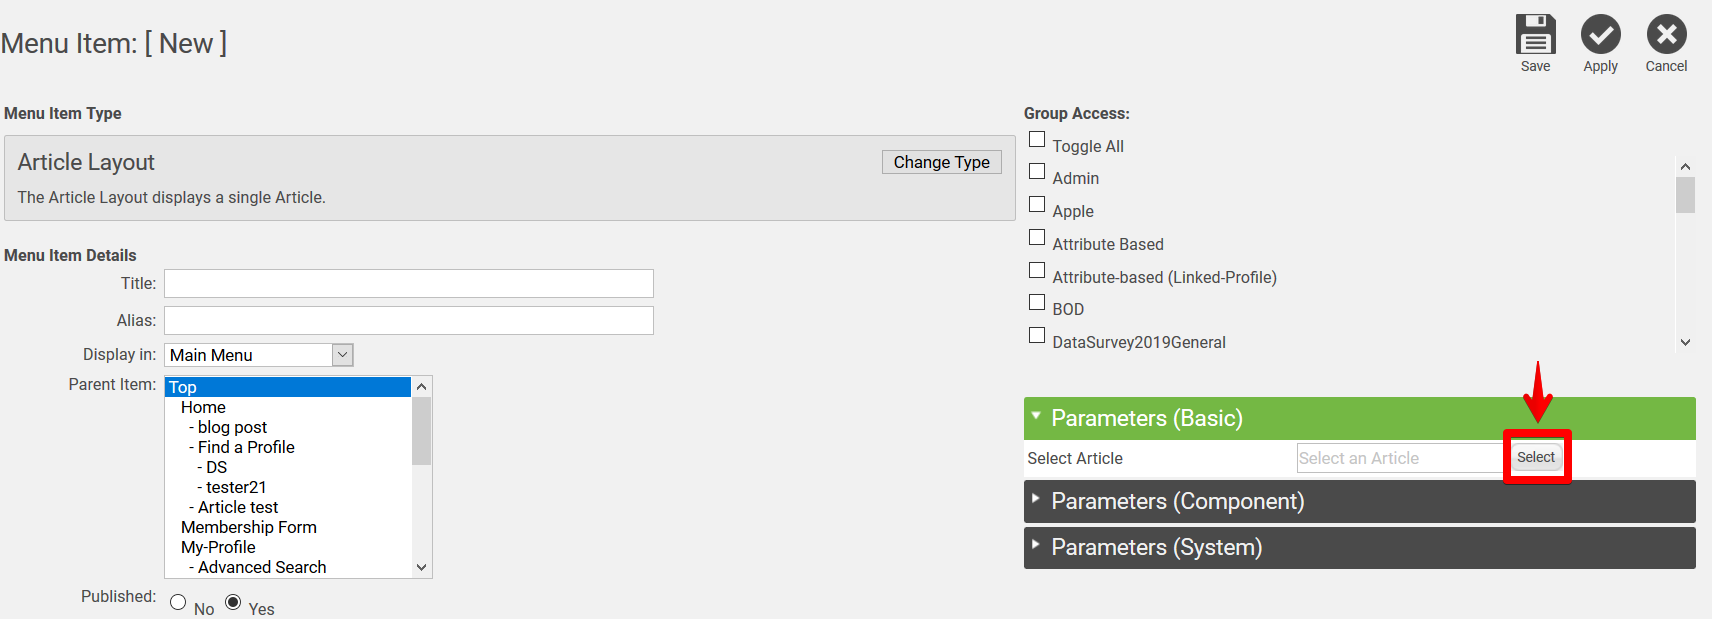
When you do, it will take you inside the menu item's settings. Once here, to link the menu item to the article, you'll want to click on the Select button that is pictured below.

Once you click the Select button, a box will appear that lists out all of your articles. Locate the article you want to link to the menu item and click on its name. Once you do, the article's name will appear in the 'Select an Article' box that's just to the left of the Select button in the above screenshot. Make any other needed changes, such as giving the menu item a title and permissioning who can see it in the group access section, then save your changes and you're done.
To note: Only published articles can be linked to menu items, so if you don't see an article, check the article itself to ensure that it's published. Also, if you've not yet created the article, you want to do that first before attempting to link it to a menu item. You can access our article creation guide by clicking here.