What is it?
The Calendar tool will allow you to add events to your organization's calendar.
How to Access
Navigate to Community > Calendar

Creating an Event Category
Event Categories allow you to color code events on the calendar. You can have as many categories as you like, and each category can have a unique color assigned. We recommend setting up your Category and event Locations prior to adding a new event.
1. To configure an Event Category, click on Manage Categories.
3. Select New to add a new Category.
4. Title the new Category.
5. Choose an identifying color for the Category. All events added to this Category will be highlighted in the category's color.
6. Once you've chosen the category color, Save.
Adding Event Locations
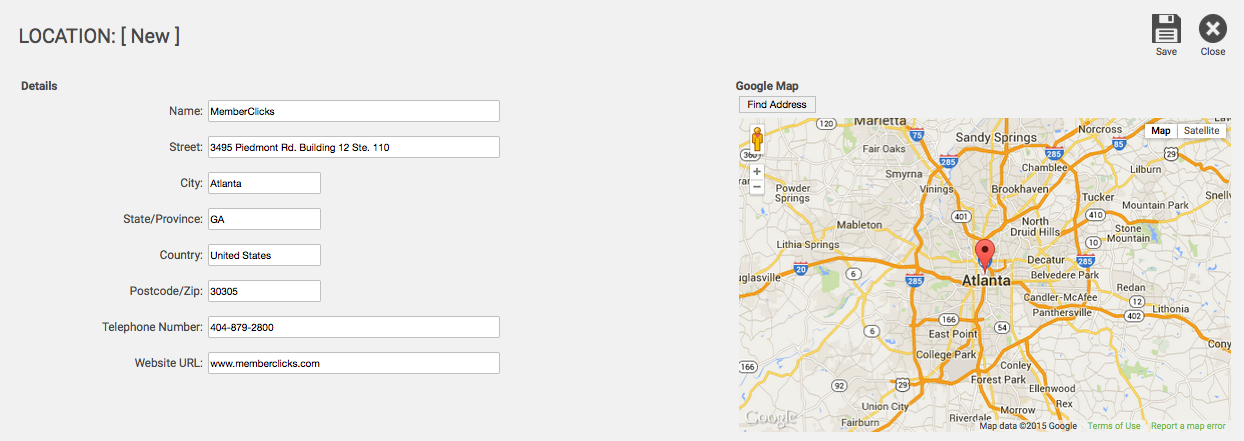
Adding a location to an event will allow users to view location details and a map to that location. We recommend setting up your Locations and Categories prior to adding a new event.
1. To add a new event Location, select Manage Locations.
2. Select New to add a location.
4. Enter the details of the new location. Important: For the map to update and show your location, you must click the Find Address button above the map after you enter your location details. If you do not, the map will not update its displayed location.

5. Once location details have been entered, Save.
Adding an Event
We recommend configuring event Categories and Locations prior to adding a new event.
1. To add an event, click Manage Events, then click the New plus sign in the top right-hand corner.
2. Next, configure the event.
- Event Title: The name of the event (ex. 2020 Annual Meeting).
- Category: The event category. Multiple categories can be created to color code events on the calendar (ex. weekly meeting, annual conference, etc.).
- Start, End, Duration: The start and end date and time of the event. If applicable, check "All day event or unspecified time". Set the event's time zone in the drop-down (by default, this pulls in from your Account Settings). To note: If you're changing an existing event date to a different year, and you're doing so through the calendar pop-up, you must re-select both the month and day after changing the year. If you just change the year and attempt to save, it will list the previous date.
- Repeat Type: Allows you to specify whether the event is a repeat event, and if so, how often the event repeats.
- Event Description: The event details area. Include a description of the event, pictures if applicable, etc.
- Select Location: Where the event will take place. Use the Select Location button to choose a location from your Manage Locations tab. If you are not using a predefined event location from the Manage Locations area, put the event's location in the event description section.
-
Contact: Enter the event contact person's information.
3. Once the event has been configured, Save.
Editing Permissions
By editing Event Permissions, an Admin has the ability to control which groups in the database have access to view each event.
1. To edit event Permissions, click on Permissions.
3. Using the checkboxes next to each event's name, edit the permissions for each group.
4. Once Permissions have been selected, Save.